A first campground arrival checklist gives you a calm sequence
A first campground arrival checklist helps you slow down, inspect the site, communicate clearly, and settle your RV according to its own instructions. It should not force every rig into one universal operating sequence. Motorhomes, trailers, leveling systems, slides, electrical equipment, and towing arrangements differ. Use this guide to organize the stages, then write the technical steps from your manuals and qualified instruction.
This article contains paid Amazon links. As an Amazon Associate I earn from qualifying purchases. The links open Amazon product searches so you can compare options; check compatibility, dimensions, and current seller details before buying.
In this guide
- A first campground arrival checklist gives you a calm sequence
- Before departure: collect the arrival information
- Stage one: stop in the designated check-in area
- Stage two: inspect the site before entering it
- Stage three: agree on communication before parking
- Stage four: park deliberately and reassess
- Stage five: use your rig-specific setup sequence
- Stage six: check utilities before connecting
- Stage seven: check the interior before unpacking
- Stage eight: settle the household, then decorate the campsite
- If you arrive after dark or outside office hours
- Your quick arrival review
- Prepare a site inspection card for your complete setup
- Organize the checklist around decision points
- Check clean-water equipment before you need it
- Match pressure equipment to the RV's instructions
- Keep utility tasks clean and separate
- Plan light for inspection without normalizing rushed late arrivals
- Walk through three common arrival changes
- Establish a quiet setup agreement with visitors
- Make the first morning part of arrival
- Record the site information that helped most
- Frequently asked questions
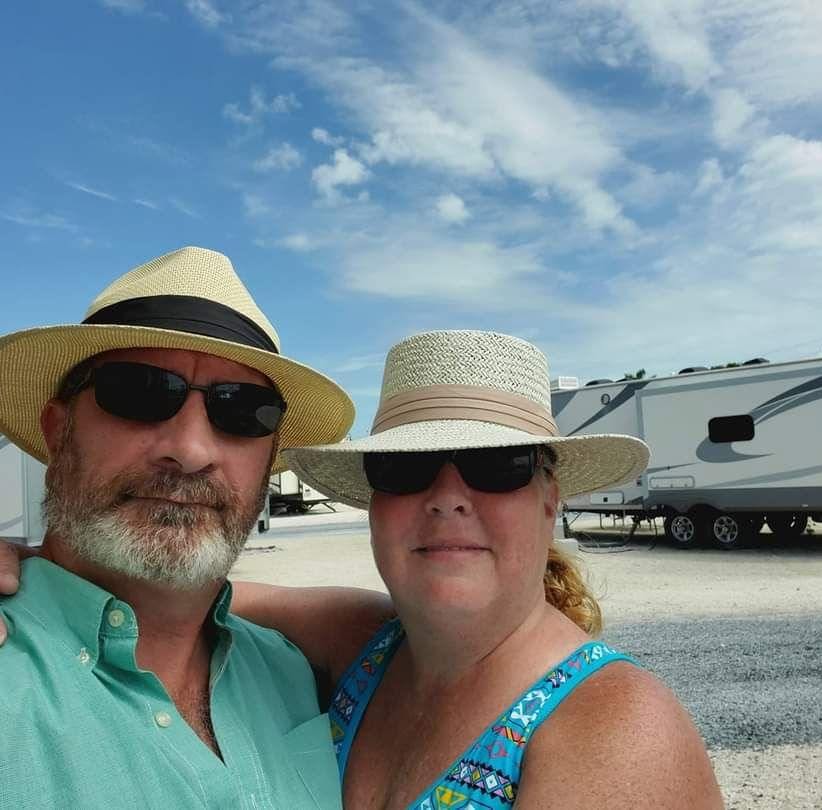
We’re Joe and Jana Martin. Our four years of full-time RV travel, including eight months in the Florida Keys, shape our preference for a manageable pace. A good arrival is one where you have time to notice a problem before committing to it. The campsite can wait while you check the details.
Before departure: collect the arrival information
Save the reservation, campground phone number, physical address, site details, and current check-in instructions. Confirm the office hours and what to do if delayed. Store the information somewhere you can access without mobile service. The last mile is a poor time to discover that a confirmation email will not load.
Review the campground’s directions along with route information suitable for your complete vehicle arrangement. Ask about access restrictions, entrance locations, turns, grades, branches, and any route the campground specifically advises against. A passenger-car shortcut may not suit your rig.
Confirm the site’s dimensions and services before the trip. Know what you reserved, whether additional vehicles fit, and what equipment your RV requires. Keep your first stay simple enough that you can learn without adding an unnecessarily difficult approach.
Stage one: stop in the designated check-in area
Look for the campground’s signs and instructions. Use the designated arrival area if one is provided and suitable. Avoid blocking roads, facilities, or another guest’s site while working out where to go. If you are unsure, stop somewhere safe and contact staff.
Confirm the assigned site and ask whether anything has changed. Check the permitted direction of entry, one-way roads, speed rules, parking, quiet hours, and departure time. Find out how to contact someone if the site does not work for your rig.
Keep children and pets secure while adults are occupied. Assign responsibility rather than assuming someone else is watching. You can greet neighbors after the RV is safely parked and the essential arrival tasks are complete.
Stage two: inspect the site before entering it
Where safe and permitted, walk the site and the approach. Look at the complete path the vehicle and any trailer will take, including turning room, tail swing, overhead clearance, branches, posts, rocks, soft edges, and slopes. Do not rely on the numbered pad alone.
Consider where the RV will sit once parked. Check room for slides, doors, awnings, steps, storage access, and required equipment operation. Identify the location of utilities and whether your suitable equipment will reach without creating a hazard. Look for damage or anything that appears unsafe.
If the site is unsuitable, contact staff for help or another option. Do not drive farther into a tight situation simply because you feel pressure from a waiting vehicle. Ask for time and space to make a safe decision.
Stage three: agree on communication before parking
Decide who drives and who spots, if you use a spotter. Agree on signals and a clear stop signal before the vehicle moves. The driver should stop whenever communication or the spotter’s location becomes uncertain. Do not assume the other person can see what you see.
Keep spotters and bystanders clear of the vehicle’s path and pinch points. A spotter should not stand where a moving vehicle, trailer, obstacle, or other traffic can trap them. Use qualified instruction to learn safe positioning for your arrangement.
Pause if several people begin giving directions. Choose one agreed communication source and explain that you need a moment. Helpful neighbors may mean well, but conflicting instructions make an unfamiliar maneuver harder.
Stage four: park deliberately and reassess
Move slowly and stop to check as needed. There is no prize for completing the maneuver in one attempt. Get out and look when you need to understand a clearance or position. Use the methods appropriate to the vehicle and conditions.
Before beginning setup, check whether the parked position supports the required procedure. Reassess utility reach, slides, doors, steps, room around the RV, and ground conditions. It is usually easier to adjust the position before equipment is connected and the interior is expanded.
Follow the vehicle and component instructions for securing the parked setup. Do not substitute this article for the required brake, wheel, hitch, leveling, or stabilizing procedure. If a condition falls outside what you understand or the equipment can safely handle, stop and get help.
Stage five: use your rig-specific setup sequence
Write your own ordered list using the RV manual and the instructions for installed components. This may involve parking security, leveling, stabilizing, unhitching, slides, and other steps, but their order and conditions depend on the setup. Include the checks needed before moving any equipment.
Keep people, pets, and belongings clear of moving components. Check outside as well as inside where required. Do not operate a system against an obstruction or continue when something behaves unexpectedly. Seek appropriate help rather than repeatedly trying a step that appears to be failing.
Mark each completed stage and return to the last confirmed step after an interruption. If one person usually performs the procedure, show the other person where the instructions are and how to identify a problem. Shared understanding reduces dependence on memory.
Stage six: check utilities before connecting
Identify the electrical, water, and sewer connections that apply to your reservation. Compare them with your RV’s requirements and the equipment you have. Look for visible damage, leaks, exposed components, or an arrangement you do not understand. Report concerns to campground staff and use qualified assistance where needed.
Follow the instructions for your electrical equipment and any protective devices. Do not bypass a warning or improvise an adapter arrangement to make a questionable hookup work. If the connection is unsuitable, leave it disconnected while you resolve the issue.
Use potable-water equipment for the fresh-water connection and keep it separate from waste-handling supplies. Follow your RV and component instructions for pressure, filling, connection, and sanitizing as applicable. For sewer equipment, follow the system instructions, campground requirements, and appropriate hygiene practices. This checklist organizes tasks; it does not replace technical operating directions.
Stage seven: check the interior before unpacking
Confirm that doors, steps, slides, appliances, and other systems are in the appropriate state according to their instructions. Look for items that shifted in travel. Open cabinets carefully and secure anything that needs a better travel location next time.
Check that exits and walkways remain clear. Locate alarms, emergency equipment, and the physical campground address. Learn the campground’s emergency instructions and where suitable shelter is available. Keep essential contact details accessible to both adults.
The U.S. Fire Administration’s RV guidance provides a useful safety reference. Maintain alarms and equipment as their manufacturers direct. Do not ignore an alarm, unusual smell, or other indication that something may be unsafe.
Stage eight: settle the household, then decorate the campsite
Give pets water and a calm, secure arrangement appropriate to them. Check campground rules before walking them or setting up outdoor equipment. Help everyone understand the boundaries of the site and the locations of roads, water, and other hazards.
Prepare the simple meal you planned for arrival. Put everyday essentials where they belong and make the sleeping space comfortable. Leave optional outdoor setup until you know where people need to walk, how the site drains, and what weather or campground rules affect your plans.
Do a short review together. Is anything unresolved? Does a connection need attention? What time do you need to check out, and what will the departure require? A small note now can prevent a rushed search on the morning you leave.
If you arrive after dark or outside office hours
Contact the campground before the office closes if you expect a delay. Follow its current late-arrival instructions and confirm how to obtain the site information. Ask whether the entrance and route to the assigned site are suitable for your arrival conditions.
Darkness makes it harder to assess a site and equipment. Reduce distractions and avoid optional tasks. If you cannot confidently evaluate the approach or complete the required setup safely, contact staff or use a suitable alternative arrangement. Do not force a maneuver because you have already traveled a long way.
Make the next morning part of the plan. Recheck the site, equipment, and anything you deferred when there is adequate light. Use the experience to adjust your next travel day rather than treating late arrival as the normal goal.
Your quick arrival review
- Reservation, directions, and campground contact saved offline.
- Check-in completed and site assignment confirmed.
- Approach and site inspected for the complete rig.
- Parking roles, signals, and stop procedure agreed.
- Position checked before connecting or expanding equipment.
- Rig-specific setup completed using its instructions.
- Utility suitability checked before connection.
- Interior, exits, pets, and emergency information reviewed.
- Remaining questions recorded and departure time noted.
Prepare a site inspection card for your complete setup
Keep the measurements and operating needs you use when assessing a campsite in one accessible place. Include the complete vehicle arrangement, relevant height information, the room required by moving components, and the services your rig needs. Obtain those details from appropriate documentation and measurement rather than a model name alone.
Use the card to ask specific questions before booking and to support the inspection after arrival. A campground employee may be able to advise on its roads and sites, but the driver still needs to assess actual conditions. A previously suitable site can be affected by parked vehicles, branches, maintenance, or other changes.
Do not use the card as permission to squeeze through an uncertain clearance. If the information or conditions do not support a confident decision, stop and ask. The card's value is reducing missing information, not removing the need to look at the route in front of you.
Organize the checklist around decision points
Place a clear pause before entering the site, before operating setup equipment, and before connecting utilities. At each pause, ask whether the conditions match what the next stage requires. This keeps a problem found during inspection from being forgotten while attention shifts to parking or unpacking.
Write the technical steps from the correct manuals in the order required for your rig. Use a separate note for something you need to ask a technician. An unresolved question should remain visible; do not quietly replace it with a neighbor's procedure to make the list look complete.
For carrying the printed list, compare covered clipboards on Amazon (paid link). Choose a manageable size and secure travel location. Keep the current revision on top and remove superseded copies so the household does not accidentally use two different procedures.
Check clean-water equipment before you need it
Identify the water arrangement included in the reservation and the connection your RV requires. Review the manufacturer's instructions for the equipment you will use. Inspect hoses, fittings, and storage before departure so a missing or unsuitable part is not first discovered beside the campsite connection.
If you need a suitable hose, compare RV drinking-water hoses on Amazon (paid link). Review intended use, connection size, length, pressure and temperature specifications, and care instructions. Choose the length for the expected setup and storage rather than automatically buying the longest hose available.
Keep potable-water equipment separate from waste-handling supplies and maintain it as directed. Do not assume clear-looking water or a familiar fitting answers every suitability question. If the connection or equipment raises a concern you cannot resolve, leave it disconnected and contact the campground or an appropriate professional.
Match pressure equipment to the RV's instructions
Before buying or adjusting water-pressure equipment, establish what your RV and installed components require. Read the relevant manuals and ask qualified support when the requirements are unclear. A general online pressure number is not a substitute for the specifications of your setup.
Compare adjustable RV water-pressure regulators on Amazon (paid link) when a regulator is appropriate for your system. Check fittings, ratings, instructions, and how the device is intended to be installed and adjusted. Do not treat every product appearing in search results as suitable for the same installation.
Inspect for damage and follow the connection procedure for the complete arrangement. If readings, leaks, or operation appear abnormal, stop and investigate appropriately. A gauge is a source of information, not a reason to ignore a fault or continue using equipment outside its instructions.
Keep utility tasks clean and separate
Choose storage locations that prevent clean supplies from becoming mixed with waste equipment. Make the categories obvious to everyone using them. A consistent arrangement makes setup easier and reduces the chance that a tired traveler reaches for the wrong item.
Where suitable for the task and your equipment, compare RV utility storage bags on Amazon (paid link). Check dimensions, material, cleaning instructions, and whether the design supports the way the contents must be stored. Bags do not replace appropriate hygiene or equipment maintenance.
After use, follow the relevant cleaning and storage procedure. Keep labels or colors consistent, but do not rely on color alone if another person cannot easily distinguish the categories. A simple written label can prevent confusion. Revisit the arrangement if equipment repeatedly gets placed in the wrong location during departure.
Plan light for inspection without normalizing rushed late arrivals
A portable light can be useful for reading a label or checking a compartment while safely parked. Keep it accessible before the interior is unpacked. Confirm its charging or battery arrangements before the trip and store it securely when moving.
If you need one, compare rechargeable inspection lights on Amazon (paid link). Review brightness settings, intended conditions, power needs, and the manufacturer's instructions. Choose a light you can handle comfortably for the actual task rather than assuming the highest brightness rating is always best.
Good lighting does not make an uncertain maneuver, steep site, damaged connection, or unfamiliar operating procedure acceptable. If you cannot complete the required inspection safely, stop and use an appropriate alternative. Continue to plan arrival with enough daylight and time instead of treating a new light as a substitute for margin.
Walk through three common arrival changes
First, imagine the assigned site is occupied. Stop in an appropriate location and contact staff. Do not improvise a new site assignment or block another guest while assuming the issue will be resolved immediately. Keep the reservation information available and ask where you should wait.
Second, imagine the utility arrangement differs from the reservation. Compare the actual connection with your needs and compatible equipment. Speak with staff before using a workaround. If a connection is damaged or unsuitable, leave it disconnected while the issue is addressed.
Third, imagine you are delayed until after office hours. Use the current instructions confirmed with the campground, and assess whether conditions allow a safe arrival. Keep an alternative in your travel plan. Working through these situations before departure makes it easier to pause when the real arrival does not follow the expected sequence.
Establish a quiet setup agreement with visitors
Decide in advance how you will handle greetings while parking or connecting equipment. A short, friendly explanation that you will visit after setup keeps attention on the task. Ask children and other bystanders to remain in a safe place appropriate to the circumstances, with a clearly responsible adult where needed.
Avoid delegating an unfamiliar technical task simply because someone offers help. Explain the operating instructions and roles you are using. If qualified assistance is needed, seek it through a suitable route rather than allowing several people to experiment with the system.
After the essential procedure is complete, take a moment to review it before switching to socializing or outdoor setup. This transition pause helps catch tasks left unfinished during an interruption. Record any uncertainty immediately instead of assuming it will be obvious when you next look at the campsite.
Make the first morning part of arrival
During the next suitable daylight period, review anything you deferred and any concern recorded the evening before. Reassess the campsite layout and equipment without disturbing systems unnecessarily. Follow the relevant instructions if a check requires a specific condition or procedure.
Confirm the remaining stay details: checkout, rubbish, laundry, pet areas, local emergency information, and how to reach staff. Put practical information where both travelers can find it. You can then make ordinary plans without repeatedly searching a confirmation email or asking the office the same question.
Finally, update your checklist from the experience. Add a missing preparation step, clarify a role, or relocate an item that was difficult to retrieve. Keep technical changes grounded in authoritative instructions. A good first arrival produces a comfortable stay and a better process for the next campground, even when it took more time than you expected.
Record the site information that helped most
After settling in, note which pre-arrival information proved useful and which important detail was missing. Record the actual site and visit rather than making claims about every space in the campground. Your observations may concern the approach, utility reach, available room, or the clarity of check-in instructions.
Use the note to improve your next booking questions. If the approach demanded more attention than expected, ask a future campground more specific questions about turns and access. If a connection was farther away than you anticipated, include location and suitable reach in the next site review rather than automatically buying extra equipment.
Keep the note factual and practical. A comfortable arrival depends on the combination of your rig, the site, conditions, and the procedure you use. The lesson you carry forward should identify that combination so you can make a better decision next time. This turns a completed checklist into useful preparation for another stay rather than a sheet you discard once the RV is parked.
Frequently asked questions
Should I connect utilities before leveling or extending slides?
Use the operating sequence for your particular RV and installed components. A general campground article cannot establish a safe universal order. Put the correct sequence on your own checklist and get instruction if anything is unclear.
What if the campground site does not match what I expected?
Stop before forcing the RV into it. Compare the actual conditions with your needs and speak with staff. Ask for a suitable alternative or assistance, and keep the reservation information available while you discuss the issue.
How can we become quicker at arrival?
Practice a correct routine and give equipment a consistent storage location. Speed should follow familiarity; it should not replace inspections or required steps. The First Month RV Routines and Campground Planning guide help connect arrival with the rest of your trip.
For practical RV tips and updates, join The Open Road Letter.